Quick Start
This guide walks you through creating your first dmp-af project from scratch using the included Jaffle Shop example.
Overview
You'll learn how to:
- Set up a local Airflow environment
- Configure a dbt project for dmp-af
- Generate Airflow DAGs from dbt models
- Run and monitor distributed dbt tasks
Step 1: Set Up Airflow
Option A: Using Docker Compose (Recommended)
The easiest way to get started is with the provided Docker Compose setup.
First clone dmp-af repository
Navigate to examples directory:
This starts:
- Airflow webserver (http://localhost:8080)
- Airflow scheduler
- PostgreSQL database
- All required services
Default credentials: airflow / airflow
See Docker Setup for more details.
Option B: Local Airflow Installation
If you prefer a local installation:
# Set Airflow home
export AIRFLOW_HOME=~/airflow

# Install Airflow
pip install apache-airflow==2.10.5

# Initialize database
airflow db init

# Create admin user
airflow users create \
    --username admin \
    --password admin \
    --firstname Admin \
    --lastname User \
    --role Admin \
    --email admin@example.com

# Start services
airflow webserver --port 8080 &
airflow scheduler &
Step 2: Build the dbt manifest
Run the build script:
This script:
- Installs dbt dependencies
- Compiles the Jaffle Shop projects
- Generates
target/manifest.json
All files are mounted to the Airflow container, so you can use them in the next step.
Step 4: Configure Airflow Pools
dmp-af requires Airflow pools for task management:
Or use the Airflow UI:
- Navigate to Admin → Pools
- Create pools as shown above
Step 5: Create Your DAG File
The example already includes a DAG file at examples/dags/example_advanced_dmp_af_dag.py.
Here's a simplified version to get started:
# dags/my_first_dag.py
# LABELS: dag, airflow

from dmp_af.dags import compile_dmp_af_dags
from dmp_af.conf import Config, DbtDefaultTargetsConfig, DbtProjectConfig

# Configure your dbt project
config = Config(
    dbt_project=DbtProjectConfig(
        dbt_project_name='jaffle_shop',
        dbt_project_path='/path/to/examples/dags/jaffle_shop',
        dbt_models_path='/path/to/examples/dags/jaffle_shop/dbt/models',
        dbt_profiles_path='/path/to/examples/dags',
        dbt_target_path='/path/to/examples/dags/jaffle_shop/target',
        dbt_log_path='/path/to/examples/dags/jaffle_shop/logs',
        dbt_schema='jaffle_shop',
    ),
    dbt_default_targets=DbtDefaultTargetsConfig(default_target='dev'),
)

# Compile DAGs from manifest
dags = compile_dmp_af_dags(
    manifest_path='/path/to/examples/dags/jaffle_shop/target/manifest.json',
    config=config,
)

# Register with Airflow
for dag_name, dag in dags.items():
    globals()[dag_name] = dag
Update Paths
Replace /path/to/ with the actual path to your dmp-af repository.
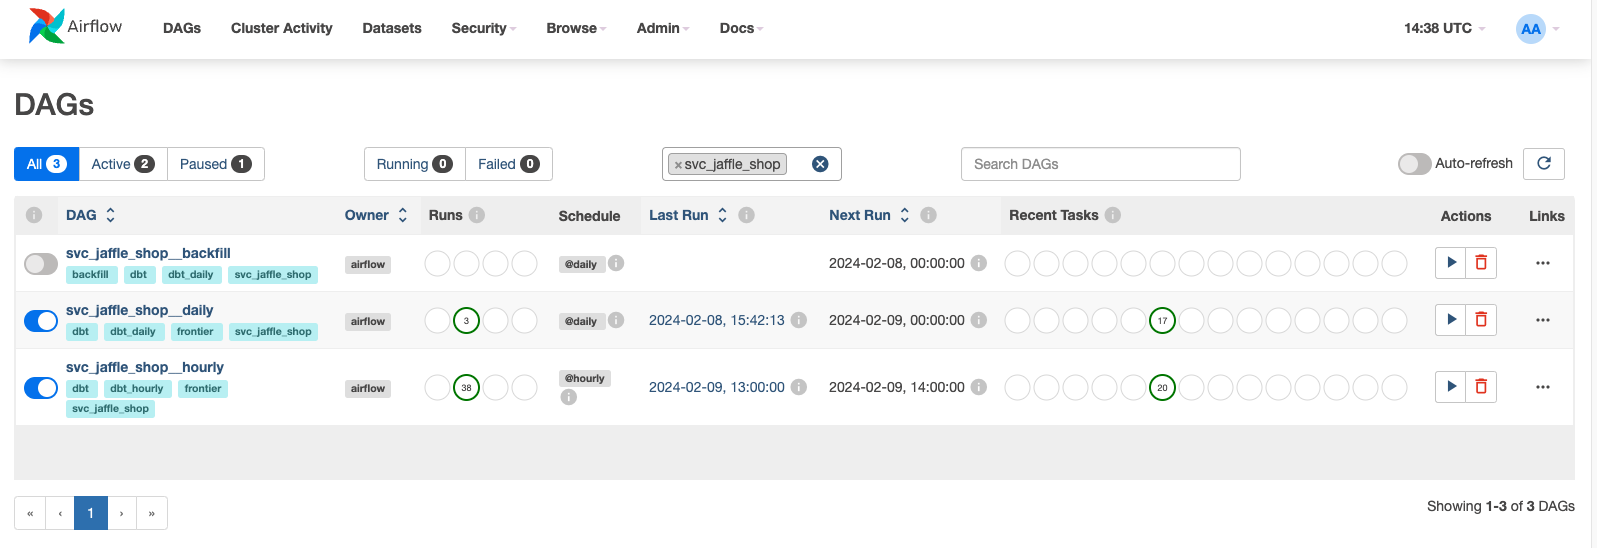
Step 6: Verify DAGs in Airflow
- Open Airflow UI: http://localhost:8080
- Log in with your credentials
- You should see DAGs like:
svc_jaffle_shop_dailysvc_jaffle_shop_hourly
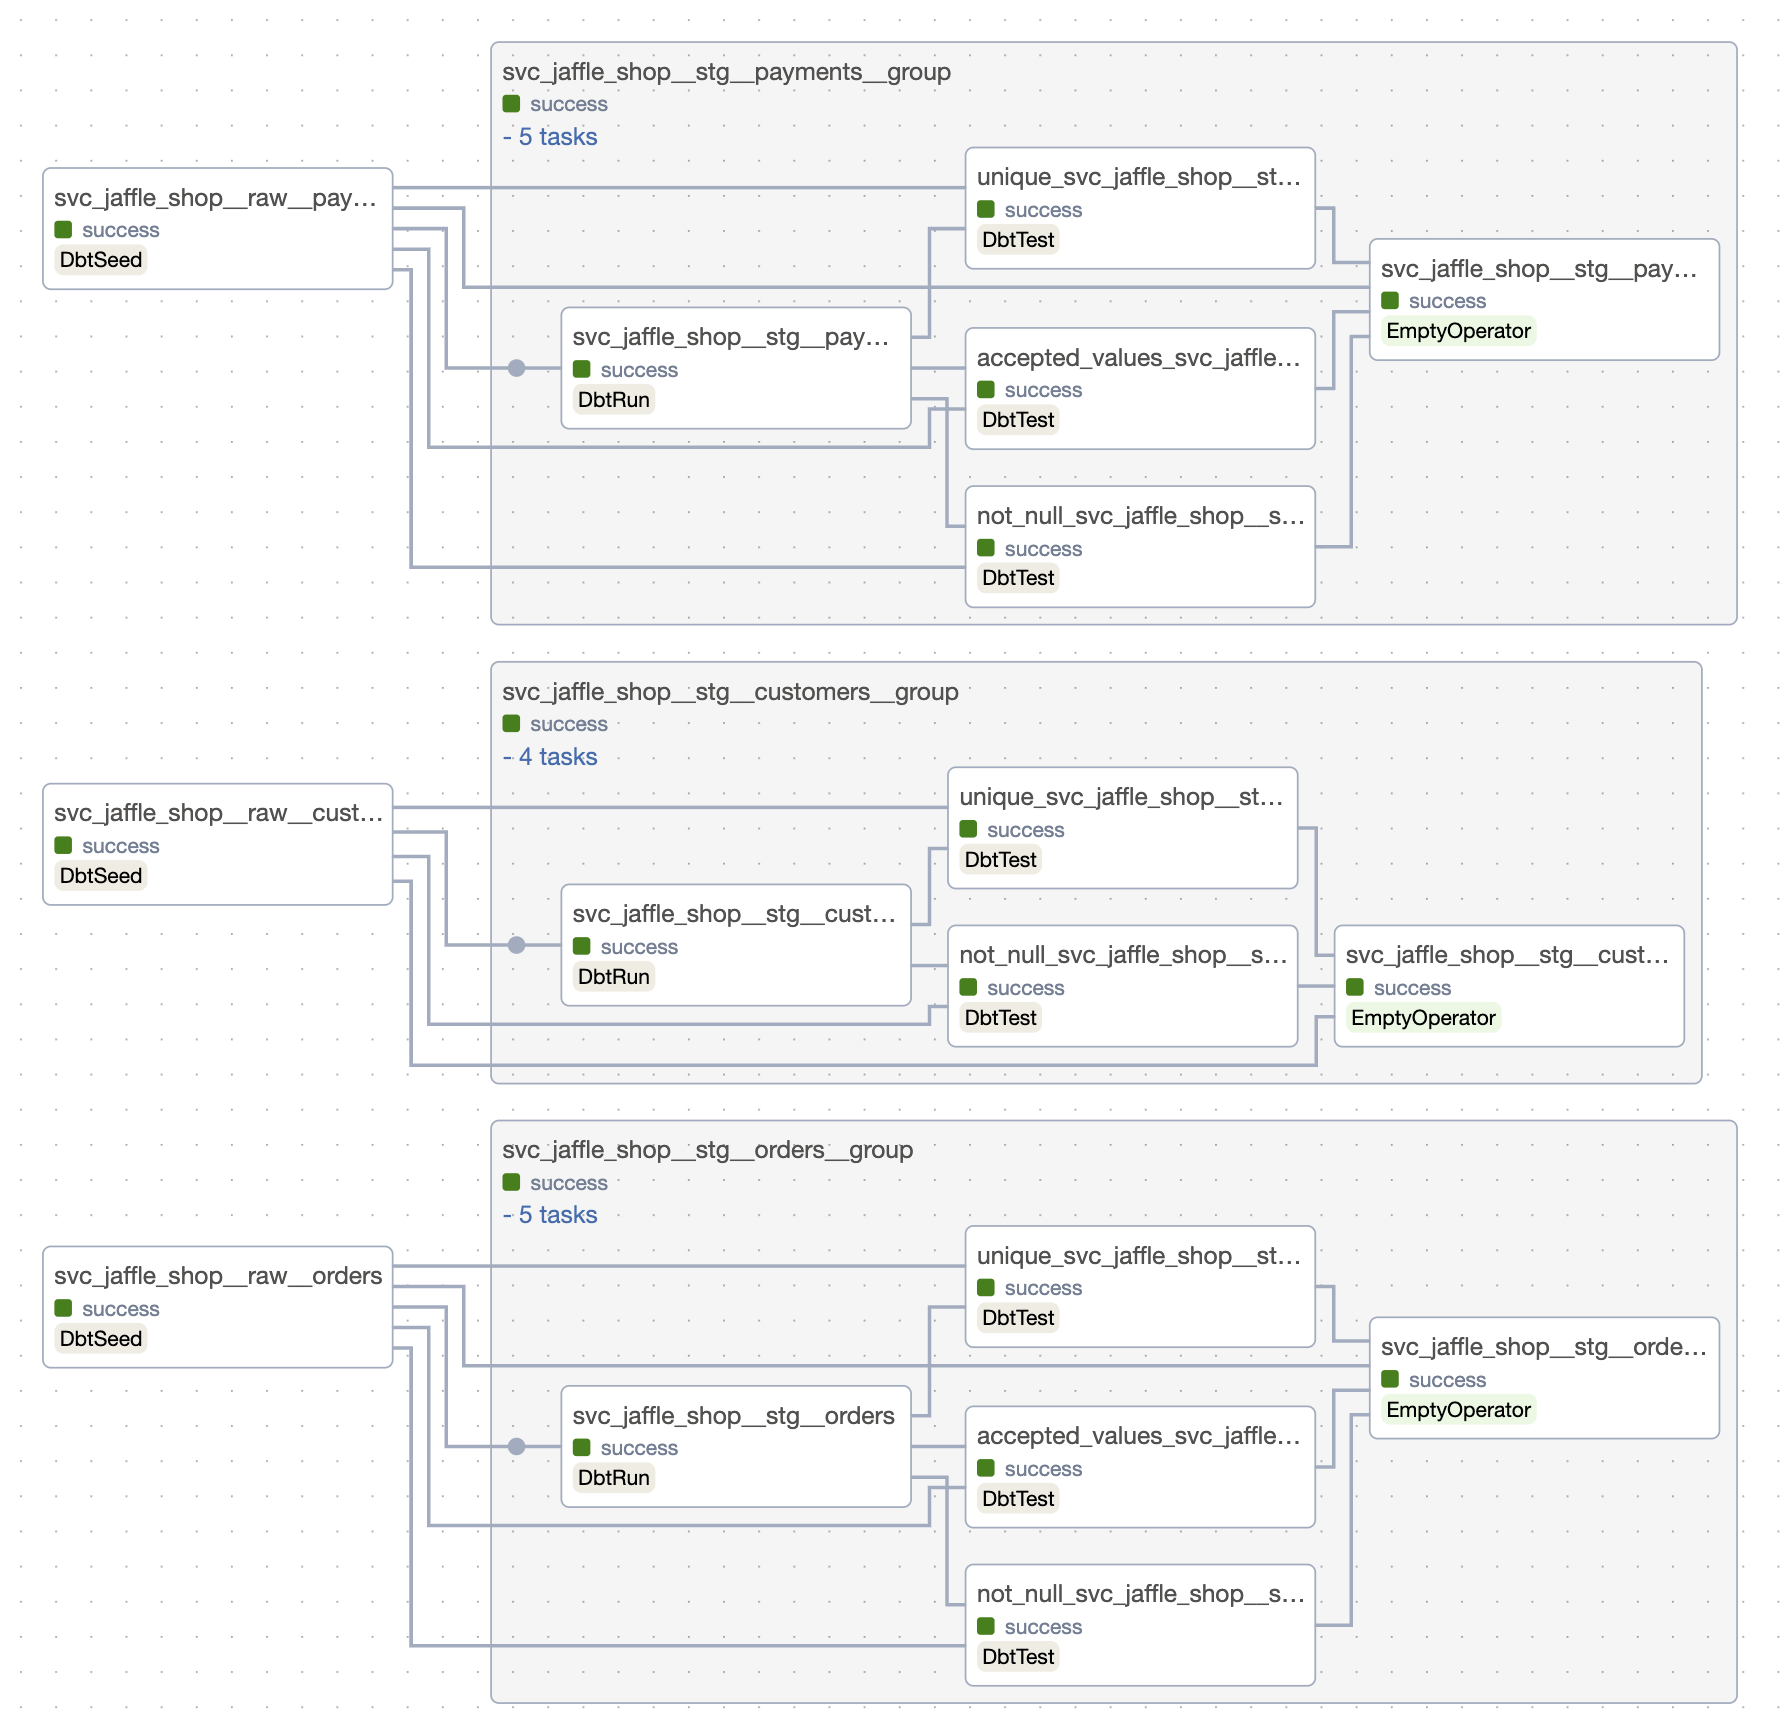
Step 7: Run Your First DAG
- Click on a DAG (e.g.,
svc_jaffle_shop_daily) - Enable the DAG using the toggle switch
- Depending on
dry-runargument fromcompile_dmp_af_dagsfunction, you are going to see either running operations for the past day (dry_run is enabled) or backfilled runs up to configured dag start date (dry_run is disabled) - Watch tasks execute in the Graph or Grid view
Understanding the Generated DAGs
dmp-af automatically creates DAGs based on your dbt project structure:
DAG Naming Convention
Examples:
svc_jaffle_shop_daily- Service domain, daily scheduledmn_analytics_hourly- Analytics domain, hourly schedulesvc_orders_daily_shift_1_hours- Daily, shifted by 1 hour
Task Structure
Each dbt model becomes an Airflow task:
For example:
svc_jaffle_shop.stg.orders- Staging orders modelsvc_jaffle_shop.ods.customers- ODS customers model
Exploring the Results
View Task Logs
- Click on any task in the DAG
- Select "Log" to see dbt execution output
- Check for SQL queries, row counts, and timing
Check Database
If using the Docker setup, connect to Postgres:
What's Next?
Now that you have your first DAGs running:
- Basic Project Tutorial - Deep dive into project structure
- Advanced Project - Multiple domains and targets
- Configuration - Customize your setup
- Features - Explore advanced capabilities
Troubleshooting
DAGs Not Appearing
- Check DAG file location is in Airflow's
dags_folder - Verify no Python syntax errors:
python dags/my_first_dag.py - Check Airflow logs:
airflow dags list-import-errors
Pool Errors
If you see pool-related errors:
Import Errors
Ensure dmp-af is installed in the same environment as Airflow:
Manifest Not Found
Verify the manifest path exists and is readable:
Recompile if needed: